If you use a Macbook and are not able to figure out how to take a Screenshot, well, you are at the right place. In this article, we will quickly take you through the Keyboard shortcuts to use to take screenshots on a Mac.
Apple macOS is slowly becoming the go-to choice for laptop users because it is fast and its operating system is super user-friendly once you get a hold of it.
With our habit of taking screenshots on Mobile phones growing day by day, if you use a laptop throughout the day while working from home, and miss taking screenshots, well, this article is for you.
Apple has made, taking screenshots in Macbook super easy and user-friendly.
Take Screenshot of a part of Screen in Macbook:
Shortcut: Command + Shift + 4
If you want to capture screenshots for just a section of the screen and not the complete screen, you can press Command + Shift + 4, and you will see that your mouse cursor changes into a plus-like sign which is used to select the screen. All you have to do is, use the three-finger mouse touch and drag the mouse pointer to select the screen area for which you want to take a screenshot.
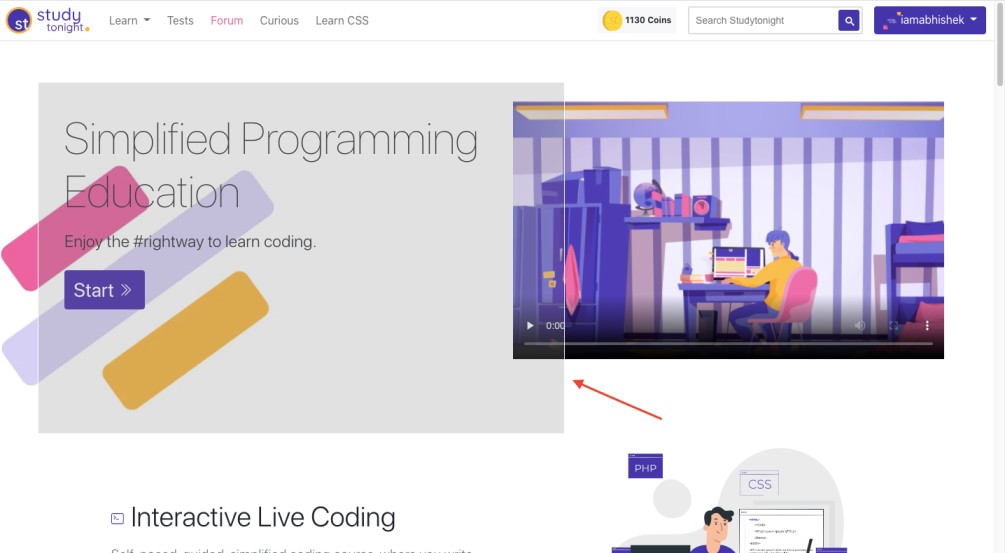
Once you have covered the screen area required, release the mouse touch and the screenshot will be captured.
Press the Escape key if you have by mistake covered the wrong screen area. It will exit the screenshot process and then you can again repeat it.
Once you have captured a screenshot, you can edit it, by clicking on the Pencil icon on the top of the Preview app in macOS.
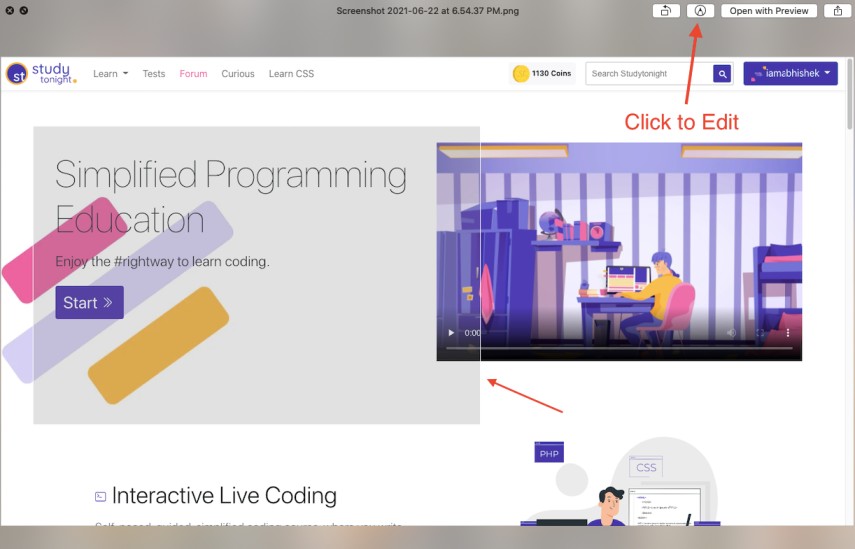
Note: I have added these arrows using Preview app edit features only.
Take a Screenshot of the complete screen in Macbook:
Shortcut: Command + Shift + 3
If you want to capture the complete desktop screen on which you are currently on, press Command + Shift + 3 and you will hear the camera click sound and the screenshot will be captured.
You can edit this screenshot too using the Preview app like we covered in the above section.
Record Screen and more options for Screenshot in Macbook:
Shortcut: Command + Shift + 5
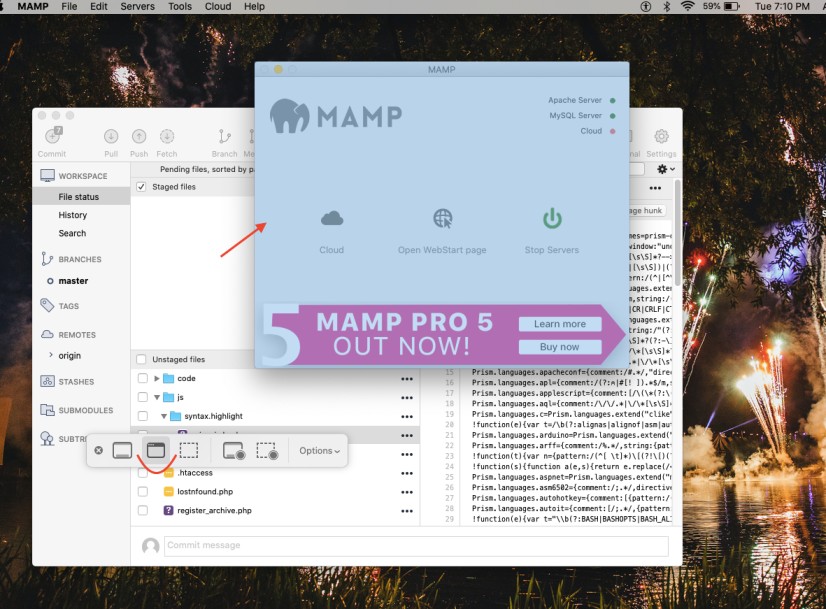
To record your screen in a video, you can press Command + Shift + 5 and you will see multiple options on the screen, some of which are used to capture screenshots as we saw above while there are options to record the screen too in video format.
The options marked with a red arc just on the left of the Options menu are used for capturing video. The one with dotted lines is used to record just a cropped(selected) area of the screen, while the option on left of it records the entire screen.
Click on these options and explore.
How to change the location of screenshots saved in Macbook?
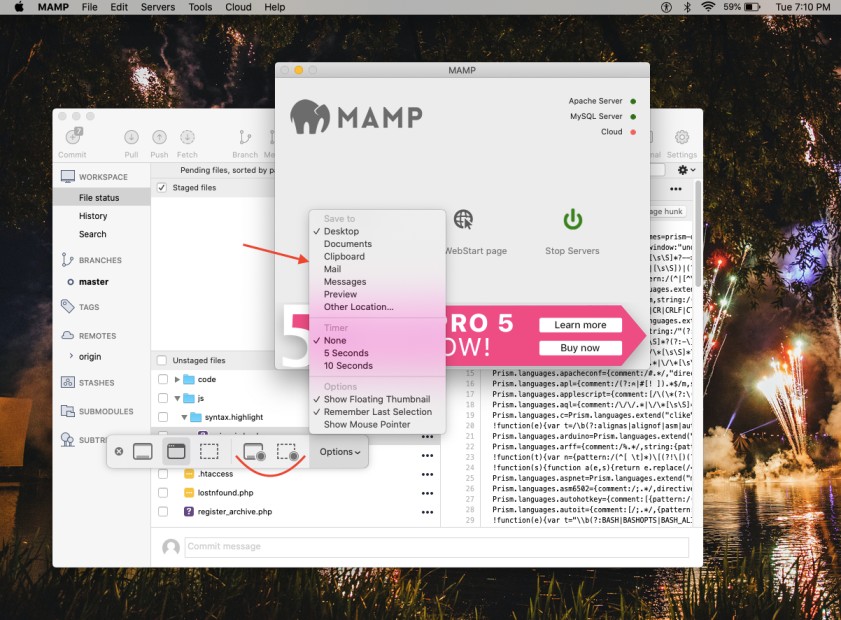
We can also choose where to save the screenshots in macOS, by pressing Command + Shift + 5, and then open the Options menu, you will see the first section of the menu is Save to and it shows a number of default locations to choose from, as shown in the picture above.
You can also set a timer if you want.
Take a Screenshot of the selected Window in Macbook:
Shortcut: Command + Shift + 5
Again, press Command + Shift + 5 and you will be presented with multiple options, choose the second option from left, which says capture the selected window, and then you can take your mouse over the App Window for which you want to take a screenshot and you will see the window highlighted in light blue color (or whatever is your macOS selected highlight color), click to capture the screenshot.
And we are done. See how simple it was.
Now you can easily take screenshots on your laptop too and continue sharing it with your friends like you used to do on your Mobile phones.
You may also like: