How to Install MySQL on Ubuntu 20.04 LTS?
MySQL is an open source relational database management system (RDBMS) that is used to store data into tables. It is the first choice for beginners for many years. It is very similar to Mariadb which is a completely open source fork of Mysql.
In this tutorial, we will install MySQL on Ubuntu 20.04 LTS (or Ubuntu 22.04 LTS or any Debian based Linux distribution). So, let's get started and follow the following steps.
In the upcoming steps, You may require to have sudo or root privileges.
Here is a guide to help you check the version of your Ubuntu/Debian system.
Step 1: Update Package index
Before installing, let's first update the package index by using the below command.
sudo apt update

This command will update and fetch latest packages and version information.
Step 2: Install the MySQL Server
After updating the package index, now we can install the MySQL server by using the below command.
$ sudo apt install mysql-server
It will install the database into our local system. We can see the teaching message on the console screen.

Installing the MySQL server package will take a few minutes based on your internet speed.
Check the Version and Status of MySQL
For checking the installed version of the MySQL server, run this command.
mysql --version

To check the current status of the server, we can use systemctl command.
systemctl status mysql.service
It will display the information along with process ID.

Step 3: Configuring MySQL
After successful installation, we need to run the security script, especially If we are installing it the first time, which helps make the installation secure.
sudo mysql_secure_installation

This will take us through a series of prompts.
Press y or Y for password setup, as shown in the above image.

As shown in the above image password plugin, for authentication what kind of password you want to choose there are three levels of password
- While entering the password, a no sign appears like
* sign. That means your password is invisible on shell.
- After the script, it will ask if you want to continue with the password you entered, or you want to enter a new one. If you are satisfied, enter y to continue.
After entering the password, It will prompt you with some security options that you should choose in order to secure the MySQL server.
- Remove anonymous users? (Press y|Y for Yes, any other key for No) :
y
- Disallow root login remotely? (Press y|Y for Yes, any other key for No) :
y
- Remove test database and access to it? (Press y|Y for Yes, any other key for No) :
y
- Reload privilege tables now? (Press y|Y for Yes, any other key for No) :
y
After completion of the script, move on to creating a dedicated database user with MySQL client.
Step 4: Connect to MySQL server
After completing all the configuration and setup, let's run the MySQL by using the above command. Run this command and enter your system password.
$ sudo mysql -p
After entering a valid password, it displays the following messages.

As you can see, we are logged in to Mysql server as root.
To clean the terminal console, you can use ctrl + L shortcut.
Step 5: Creating a new user in MySQL
We can create new user to the MySQL to control user accessibility. Use the below command that will take username and password as an argument.
CREATE USER 'username'@'host' IDENTIFIED WITH authentication_plugin BY 'password';
After successfully user creation, it returns a message “Query OK”.

After creating a new user, we can also grant new user-appropriate privileges like CREATE, ALTER, DROP, INSERT, DELETE, SELECT, and so on.
The general syntax for granting user privileges is as follows:
GRANT PRIVILEGE ON database_name.table_name TO 'username'@'host';
Log in to MySQL Server with new/specific user
To access MySQL database, use the following command that will access to create and run the SQL queries.
mysql -u username -p
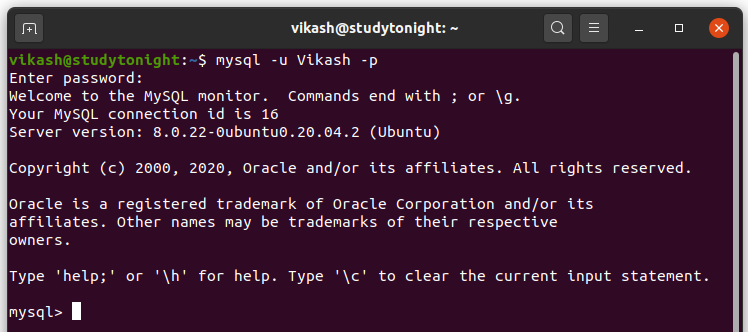
Here -u flag for the user and -p flag for password authentication.
Bonus: Stop or Restart SQL Server
You might want to know how can MySQL server daemon service could be stopped and restarted. Well, we got that covered.
Stop MySQL Server
To stop running MySQL, we can use the one of the following command.
sudo systemctl stop mysql
For non-systemd booted servers, we can use:
sudo service msql stop
Similarly, you can use start instead of stop to start the stopped server.
Restart MySQL Server
To restart MySQL run this following command. It will first stop (if running already) the mysql service and then start a new instance of MySQL service.
sudo systemctl restart mysql
# or
#sudo service msql restart
This will restart mysql service.
FAQs
Let's discuss some relevant questions related to the topic.
Q: How do I install the MySQL client only on Ubuntu?
To install MySQL client tool only, you can use the following command:
sudo apt install mysql-client
This tool will allow you to connect to a remote MySQL server with mysql command, but it will not install MySQL (server) on your local system.
Q: How to remove mysql-server in Ubuntu/Debian?
To remove MySQL from Ubuntu, run the following command. It will remove the MySQL server from your local system.
sudo apt-get remove mysql-server

Q: How to install MariaDB in Ubuntu?
You can install MariaDB (open source fork of MySQL) using the following commands:
sudo apt update
sudo apt install mariadb-server -y
These will install MariaDB server and client on your Ubuntu system.
If you face any error, try removing mysql-server before installing mariadb-server.
Q: Is there any prerequisite for installing MySQL on Ubuntu?
Yes, there are some prerequisites for installing MySQL server on Ubuntu, which are as follows:
- You need a working Ubuntu operating system. LTS versions like Ubuntu 18.04, 20.04, 22.04, or newer are recommended for servers.
- Root or sudo access for installation and configuration.
- An active internet connection is required to download MySQL packages.
- Sufficient disk space (at least 500 MB)
That's all for this tutorial on MySQL-server installation and configuration in Ubuntu/Debian based systems. We article helped you in your Sysadmin journey.